

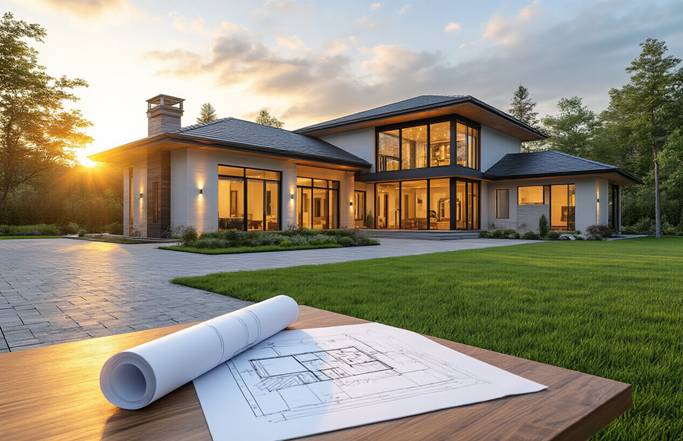
💡 “Your dream home isn’t just built with bricks and mortar—it’s built with vision, planning, and the right decisions from day one.”
Turning the idea of building your dream home into reality may sound daunting at first, but with the right approach, it becomes an exciting and achievable journey. Whether you’re a first-time builder eager to create a home that reflects your personality, a growing family in need of more space, or simply someone ready for a fresh start, careful planning is the key to success.
Designing and constructing a house from the ground up isn’t just about style or luxury—it’s about balancing your vision with practical considerations like budget, location, lifestyle needs, and local building regulations. By breaking the process into clear, manageable steps, you can avoid overwhelm and make confident decisions along the way.
In this guide, we’ll walk you through everything from defining your dream and setting a realistic budget, to choosing the right plot and putting together a team of skilled professionals. You’ll also learn how to create floor plans that truly fit your lifestyle and how to smoothly navigate the construction phase, ensuring your dream home is built exactly the way you envision it.
** Define Your Vision and Lifestyle Requirements

Identify Your Family’s Current and Future Needs
Before you start sketching floor plans or browsing Pinterest boards, take a step back and honestly assess what your family actually needs. Start with your current situation – how many bedrooms do you need right now? Do you work from home and require a dedicated office space? Are you planning to have children or expecting elderly parents to move in within the next decade?
Think beyond today’s requirements. Your dream house should adapt to your life’s next chapter. If you’re newlyweds, consider whether you’ll need a nursery, playroom, or extra bathrooms down the line. Empty nesters might prioritize guest rooms for visiting grandchildren or a workshop for hobbies they’ve always wanted to pursue.
Create a detailed list of your family’s daily activities and how they translate into space needs. Do you entertain frequently and need an open-concept kitchen that flows into the living area? Are you fitness enthusiasts who would benefit from a home gym? Does your family prefer movie nights, requiring a dedicated media room with proper acoustics?
Determine Your Preferred Architectural Style and Aesthetic
Your home’s architectural style sets the tone for everything else, from interior finishes to landscaping choices. Research different styles that resonate with you – whether that’s the clean lines of modern architecture, the charm of a craftsman bungalow, or the grandeur of colonial design.
Visit neighborhoods with homes you admire and take photos. Create mood boards that capture the elements you love. Pay attention to details like rooflines, window styles, exterior materials, and proportions. These visual references will be invaluable when communicating with your architect and designer.
Consider how your chosen style fits with your location and climate. Mediterranean-style homes work beautifully in warm climates but might look out of place in snowy regions. Similarly, extensive glass walls that define modern architecture can increase heating costs in colder areas.
Your aesthetic preferences should also align with your lifestyle. If you prefer low-maintenance living, ornate Victorian details requiring frequent upkeep might not be the best choice. Choose styles that complement how you actually live, not just what looks good in magazines.
List Must-Have Features Versus Nice-to-Have Amenities
Drawing a clear line between necessities and luxuries prevents you from overspending on features that won’t significantly improve your daily life. Start with your non-negotiables – these might include the number of bedrooms and bathrooms, garage size, or specific room requirements like a home office or mudroom.
Create two separate lists: essentials and wish-list items. Essential features might include sufficient storage, a functional kitchen layout, or accessibility features if you have mobility concerns. Your wish list
could include items like a wine cellar, smart home technology, or a swimming pool.
| Must-Have Features | Nice-to-Have Amenities |
| 2+ bedrooms | Home theater |
| 2+ bathrooms | Wine cellar |
| Home office | Swimming pool |
| Mudroom | Smart home system |
| Walk-in pantry | Guest suite |
| One-car parking | Outdoor kitchen |
Rank your wish-list items by importance and estimated cost. This exercise helps you make informed decisions when budget constraints require cuts. You might discover that upgrading your kitchen appliances matters more to you than installing a hot tub.
Consider Your Daily Routines and How Spaces Should Flow
Great home design anticipates your daily movements and creates seamless transitions between spaces. Map out your typical morning routine – do you need easy access from the master bedroom to a coffee station? Should the laundry room be near the bedrooms or kitchen?
Think about traffic patterns throughout your day. The path from the garage to the kitchen should be direct, especially when carrying groceries. Kids should be able to reach a bathroom without walking through the main living areas. Your home office needs to be positioned where you can take calls without disturbing family activities.
Consider how different family members use spaces simultaneously. While you’re cooking dinner, your spouse might be helping kids with homework at the kitchen island, and teenagers could be watching TV in the adjacent family room. Plan sight lines and acoustic separation carefully.
Seasonal variations also affect space usage. That covered patio might be perfect for summer entertaining, but how will it connect to indoor spaces during winter months? Design flexible spaces that can serve multiple purposes as your needs change throughout the year.
** Set Your Budget and Financial Framework

Calculate your total available budget including contingencies
Figuring out your complete financial picture starts with adding up everything you have available for your dream house project. Take a hard look at your savings, investments you can liquidate, and any gifts or inheritance you plan to use. Don’t forget to check your current home’s equity if you’re selling to fund this build.
Your total budget needs a safety net built right in. Construction costs can spiral quickly when you discover unexpected foundation issues, decide to upgrade materials mid-build, or face weather delays. Smart builders set aside 15-20% of their total budget as a contingency fund. If your available funds total
if your total budget is ₹50 lakh, plan to use only around ₹40–42.5 lakh for the actual construction and keep the remaining amount as a safety cushion for unexpected costs.
Create a detailed spreadsheet tracking every potential expense. Include obvious costs like land purchase, construction, and permits, but also factor in temporary housing expenses if you need to rent during the build. Don’t overlook utility connections, landscaping, window treatments, and that new furniture you’ll want for your custom spaces.
Allocate funds between land, construction, and finishing costs
Smart budget allocation follows proven ratios that prevent you from getting stuck with amazing land but no money left for construction. A solid rule of thumb splits your budget into thirds: one-third for land, one- third for basic construction, and one-third for finishes and everything else.
Your land budget should cover more than just the plot price. In India, site preparation can add anywhere from minimal costs for a level plot to several lakhs if grading, tree removal, or utility connections are required. Getting a soil test done early is essential—rocky ground, loose soil, or poor drainage can make your foundation far more expensive.
Pro Tip: Check with neighbours about their soil reports and foundation details. This simple step can save you both money and time before starting your own tests.
Construction costs vary dramatically by region and home complexity. Basic construction runs ₹1,000–₹1,500 per square foot in most areas, while custom homes with premium features can hit ₹1,800–₹2,500 per square foot or more. Research local builders and get rough estimates early in your planning process.
| Budget Category | Percentage Range | What’s Included |
| Land & Site Prep | 15-25% | Purchase, surveys, utilities, grading |
| Basic Construction | 45-55% | Foundation, framing, roofing, basic systems, RCC (Reinforced Cement Concrete) structures, brick masonry, plastering, Slab |
| Finishes & Features | 25-35% | Vitrified tile flooring, modular kitchen cabinets, brass fixtures, energy-efficient appliances |
Research financing options and pre-approval requirements
In 2025, many Indian banks and housing finance companies are offering construction & home-building loans with interest rates starting from about 7.35% to 8.50% p.a., depending on loan amount, credit profile, and bank. Some lenders, like State Bank of India, HDFC, Bank of Baroda etc., allow up to 90% funding of the property cost—though this often means a higher down-payment requirement and stricter documentation.
You’ll need to give a substantial down payment—usually 20-25% or more—and expect higher interest rates than regular home loans since construction financing is considered riskier. Lenders will ask for full architectural plans, contractor cost bids, site estimates, and proof of your ability to manage overrun costs. Your credit score should be strong (often 700+), and stable income/employment history is heavily weighed.
Processing fees, disbursement schedules (the “draws” tied to construction stages), prepayment penalties, and conversion terms (from construction-loan phase to permanent home loan) vary widely among lenders. Compare not just the stated interest but overall cost—including fees, documentation charges, and rate reset or floating vs fixed interest options. For example, Bank of Maharashtra offers home loans starting at ~7.35% p.a. with flexible tenure and some concessions.
✨ Pro Tip: Choose a lender that offers flexible disbursement (draw) schedules and does not demand full EMIs before visible construction work is done. Also, check with neighbours who recently built in your area—look at their loan terms, soil & foundation reports—to estimate what your requirements and costs might turn out to be. This foresight can save you both money and delays.
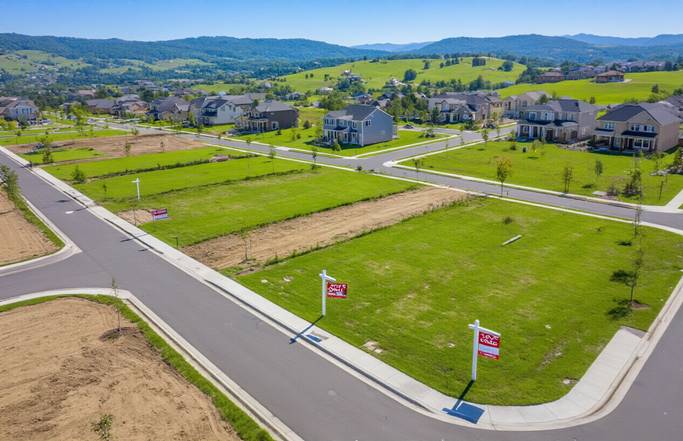
** Choose the Perfect Location and Plot
Evaluate neighborhoods based on your lifestyle priorities
Your neighborhood choice will shape your daily life for years to come, so take time to understand what matters most to you and your family. Start by creating a priority list that reflects your actual lifestyle rather than what you think sounds good on paper.
Drive through potential neighborhoods at different times of day and on weekends. Notice the activity levels, traffic patterns, and general atmosphere. If you’re an early riser who loves morning jogs, check if the area feels safe and welcoming at 6 AM. Night owls should explore how the neighborhood feels after dark.
Pay attention to the community vibe. Some areas buzz with young families and children playing outside, while others cater to professionals who value quiet sophistication. Neither is right or wrong – just different. Walk around and chat with current residents if possible. They’ll give you honest insights about everything from neighbor relations to local quirks you won’t find online.
Consider your social preferences too. Do you want close-knit community events and block parties, or do you prefer more privacy? Some neighborhoods have active homeowners’ associations that organize regular activities, while others maintain a more hands-off approach.
Assess Plot characteristics including size, slope, and orientation
Your plot’s physical characteristics will directly impact both your construction costs and your future quality of life. Size obviously matters, but bigger isn’t always better if it doesn’t match your maintenance preferences and budget.
Slope presents both opportunities and challenges. A gently sloping plot can create beautiful terraced landscaping and interesting architectural possibilities. However, steep slopes require expensive retaining walls, specialised foundation work, and can limit your design options. Flat plots are typically easier and cheaper to build on, but they might lack the dramatic views that come with elevation changes.
Orientation affects everything from your energy bills to your morning coffee routine. South-facing plots receive the most sunlight throughout the day, which can reduce heating costs but increase cooling expenses. East-facing properties get beautiful morning light, while west-facing plots can become uncomfortably hot during summer afternoons.
Study the plot’s drainage patterns, especially after heavy rain. Water should flow away from where you plan to build your house, not toward it. Poor drainage can lead to foundation problems, basement flooding, and soggy yards that never dry out.
Investigate zoning restrictions and building codes
In India, zoning regulations and building codes play a critical role in shaping what you can and cannot build on your plot. These aren’t just guidelines—they are legal requirements that directly impact the design, safety, and approval of your home construction project. Ignoring them can lead to costly penalties or even demolition orders.
Start by checking the zoning classification of your land. Residential plots often come with rules on maximum building height (commonly G+1 or G+2 in smaller towns unless extra permissions are granted), floor area ratio (FAR), and setback requirements (minimum distance from boundaries). If you’re planning for a home office, rental unit, or a separate servant quarter, ensure your zoning allows such uses.
Next, understand the building codes that govern structural safety. These cover essentials such as ceiling height (generally 2.75m–3m), minimum room sizes, proper ventilation, window placement, fire safety norms, and standards for electrical and plumbing systems. These rules may differ across states and municipalities—for example, bye-laws in Delhi differ from those in Maharashtra. Always confirm with your local municipal corporation or development authority before finalizing plans.
Also, look into special restrictions. If your plot lies in a notified heritage area, you may face limitations on architectural style and façade changes. In gated communities or colonies, Resident Welfare Associations (RWAs) or Housing Societies may impose their own rules on exterior paint, compound walls, or landscaping. For plots near coastal zones or flood-prone areas, additional permissions (such as CRZ clearance) and storm-resistant construction methods may be required.
✨ Pro Tip: Visit your local municipal office or town planning department early in the process and ask for the Master Plan or Development Control Regulations (DCR). This small step will give you clarity on FAR, setbacks, and restrictions, saving you from redesigning your house later. Also Architecture/Engineer will take care of it if you had assigned one for your house planning.
Consider proximity to schools, work, and essential services
Your daily commute and access to services will significantly impact your quality of life and long-term property value. Map out realistic travel times to your workplace during actual rush hour traffic, not just what GPS suggests during off-peak hours.
If you have children or plan to, research school districts carefully. Great schools don’t just benefit your kids – they also protect your property investment. Even if education quality isn’t your immediate concern, strong school districts typically maintain higher property values and attract more stable communities.
Think about your routine errands and how often you’ll need various services. Grocery stores, pharmacies, banks, and gas stations should be reasonably accessible. If you rely on public transportation, check current routes and schedules rather than assuming they’ll always be convenient.
Don’t forget about emergency services response times. Rural areas might offer peace and privacy, but fire and medical response could take significantly longer than in suburban locations. This consideration becomes more important as you age or if family members have health concerns.
Consider future development plans for the area. That quiet lot might be perfect now, but if the city has approved a major commercial development next door, your peaceful retreat could become much less appealing in a few years.
** Assemble Your Professional Dream Team

Select an Experienced Architect Who Understands Your Vision
Your architect will transform your dreams into buildable reality, so choosing the right one is crucial for your dream house project. Start by researching architects who specialize in residential projects similar to your vision. Look through their portfolios carefully – you want someone whose aesthetic sensibilities align with yours and who has experience with your preferred architectural style.
Schedule consultations with at least three candidates. During these meetings, pay attention to how well they listen to your ideas and whether they ask thoughtful questions about your lifestyle needs. A great architect will want to understand how you live, work, and entertain in your space before putting pencil to paper.
Check their credentials and make sure they’re licensed in your state. Ask about their design process, typical project timelines, and fee structures. Most architects charge between 8-15% of your total construction budget, though this can vary based on project complexity and location.
Request references from recent clients and actually call them. Ask about communication style, ability to stay within budget, and how well the final result matched expectations. Your architect should also have experience navigating local building codes and permitting processes in your area.
Choose a Reputable Contractor With Strong References
Finding the right contractor can make or break your dream house project. Start your search by asking your architect for recommendations – they often have established relationships with quality builders who understand their design approach.
Get bids from at least three licensed contractors. Don’t automatically choose the lowest bid, as this often leads to problems down the road. Instead, focus on value and reputation. Each contractor should provide a detailed breakdown of costs, materials, and timeline.
Verify their license and insurance coverage. Check with your state’s licensing board for any complaints or violations. Ask each contractor for references from projects completed within the last two years, and actually visit these homes if possible. Talk to previous clients about quality of work, adherence to timelines, and how well they communicated throughout the project.
Look for contractors who specialize in custom homes rather than tract housing or commercial projects. They’ll have the expertise needed for the unique challenges your dream house presents. Ask about their team – do they use their own crews or subcontractors? How do they handle change orders and unexpected issues?
Pay attention to how responsive they are during the bidding process. If they’re slow to return calls or provide estimates now, communication will likely be even worse during construction.
Hire Essential Consultants Including Engineers and Surveyors
Beyond your architect and contractor, you’ll need several specialized consultants to ensure your dream house is built safely and legally. A structural engineer is essential for custom designs, especially if you’re planning large open spaces, unusual architectural features, or building on challenging terrain.
Hire a land surveyor early in the process to establish exact property boundaries and identify any easements or restrictions. They’ll also determine elevation changes and identify potential drainage issues that could affect your house placement and foundation design. Consider bringing in a geotechnical engineer if your plot has unusual soil conditions, slopes, or if you’re building in an area prone to settling or other ground-related issues. Their soil analysis will inform foundation design and could save you thousands in future repairs.
You might also need specialised consultants depending on your location and house features. In earthquake-prone areas, a seismic engineer ensures your home meets safety standards. If you’re planning extensive landscaping or have drainage concerns, a civil engineer can design proper water management systems.
Environmental consultants may be required in certain areas to assess wetlands, protected habitats, or contamination issues. Don’t skip these assessments – discovering problems after construction begins can be extremely costly. (Only if required)
Establish Clear Communication Protocols With Your Team
Setting up effective communication systems from the start prevents misunderstandings and keeps your project moving smoothly. Create a clear chain of command and decision-making process. Typically, your architect serves as the primary coordinator between you and other team members, but clarify this upfront.
Schedule regular progress meetings with all key team members. Weekly meetings during active construction phases help catch issues early and keep everyone aligned. Use these meetings to review progress, discuss upcoming milestones, and address any concerns.
Establish preferred communication methods for different types of issues. Emergency problems might require phone calls, while routine updates can be handled via email or project management apps. Many teams now use collaborative platforms like BuilderTREND or CoConstruct that allow real-time updates and document sharing.
Document everything. Keep detailed records of all decisions, changes, and communications. Take photos during site visits and maintain a project journal. This documentation protects you if disputes arise and helps track the evolution of your dream house.
Set expectations for response times. Your team should know how quickly you expect replies to different types of questions or concerns. Similarly, understand their schedules and availability – contractors often have the busiest schedules early in the morning and late afternoon.
Create a single source of truth for project documents. Whether it’s a shared cloud folder or project management platform, everyone should know where to find the latest plans, specifications, and contact information. (For big imp projects)
** Create Detailed Floor Plans and Design Elements
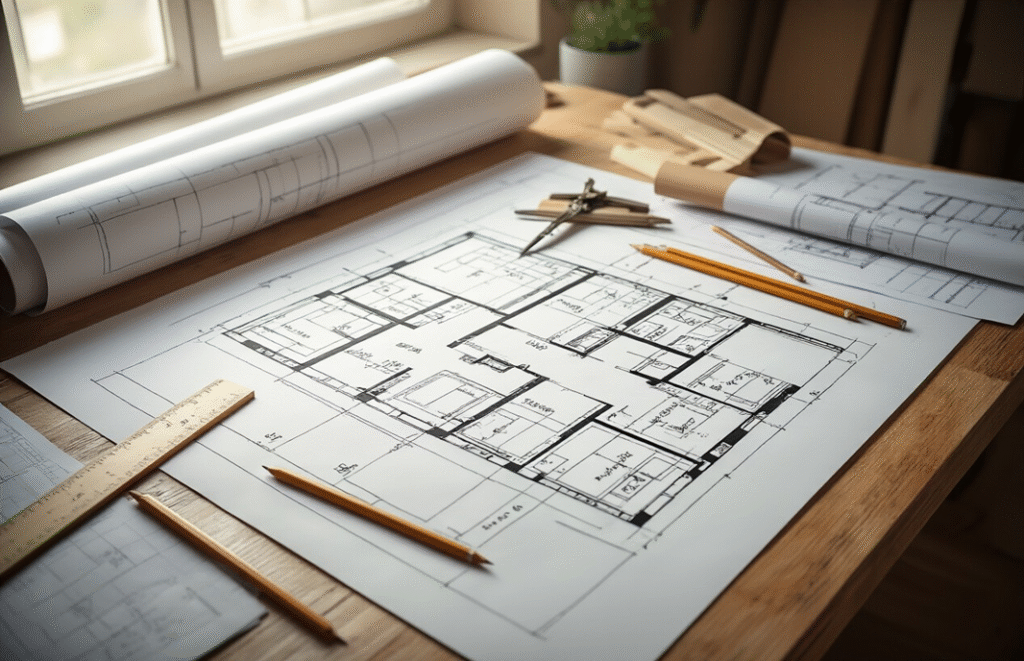
Develop room layouts that maximize functionality and flow
Your floor plan is the backbone of your dream home, and getting it right means thinking beyond just where rooms go. Start by mapping out how you actually live day-to-day. Do you cook while kids do homework nearby? Do you need a clear sightline from the kitchen to the living room for entertaining? These real-life patterns should drive your layout decisions.
Consider the natural traffic flow through your home. You want smooth pathways that don’t cut through the middle of rooms or create awkward bottlenecks. Place your most-used spaces like the kitchen, family room, and main bathroom in easily accessible spots. Think about sight lines too – opening up views between related spaces makes your home feel larger and more connected.
Room proportions matter just as much as placement. A cramped master bedroom with a huge walk-in closet rarely makes sense, but many people get caught up in features without considering daily comfort. Test your layouts by walking through them mentally at different times of day and imagining how furniture will actually fit.
Plan storage solutions and built-in features
Smart storage planning during the design phase saves you from cluttered countertops and overstuffed closets later. Every room needs designated storage that matches how you’ll actually use that space. In
bedrooms, plan for both hanging clothes and folded items. In bathrooms, think about toiletries, towels, and cleaning supplies.
Built-ins offer incredible value because they’re tailored to your exact needs and don’t eat up floor space like furniture. Consider built-in bookshelves in living areas, window seats with hidden storage, or a mudroom bench with cubbies for each family member. Kitchen pantries work better as walk-ins if you have the space, but pull-out drawers in base cabinets maximize accessibility in smaller kitchens.
Don’t forget about seasonal and bulk storage. Your garage or basement might handle holiday decorations and camping gear, but you’ll also need accessible spots for everyday items like cleaning supplies, extra linens, and kids’ sports equipment.
Select energy-efficient systems and sustainable materials
Your choice of systems and materials will define both comfort and cost in the long run. Opt for energy-efficient solutions in India such as inverter ACs, VRF systems, solar water heaters, and heat pumps. Though slightly costlier, they save heavily on electricity bills. Plan insulation early with reflective roofing, wall insulation, and double-glazed windows in India, while sealing gaps around doors and outlets to prevent energy loss. Smart window placement can also cut cooling needs.
When selecting sustainable building materials in India, prioritize durability. Stone or engineered wood flooring lasts decades, metal or clay roofs outlive concrete sheets, and fiber cement boards or fly-ash bricks perform better than cheaper options.
Pro Tip: Always choose BEE star-rated appliances and explore government subsidies for solar panels and rainwater harvesting systems in India to lower costs and boost sustainability.
Design outdoor living spaces and landscaping elements
Your outdoor spaces should feel like natural extensions of your indoor rooms. Start by thinking about how you want to use your yard – entertaining, gardening, kids’ play, or quiet relaxation. Position patios and decks where they’ll get the right amount of sun and shade for your preferred activities.
Consider privacy and views when planning outdoor areas. A well-placed fence, hedge, or pergola can create intimate spaces without blocking desirable views. Think about seasonal changes too – that sunny breakfast nook might be uncomfortably bright during summer afternoons.
Landscaping plans should account for your local climate and maintenance preferences. Native plants typically require less water and care than exotic species. Group plants with similar water needs together to make irrigation more efficient. Plan for mature plant sizes so you’re not constantly pruning or replanting.
Don’t forget practical elements like outdoor storage for tools and equipment, adequate lighting for evening use, and convenient water access for maintenance. These details make the difference between outdoor spaces you’ll actually use and ones that become maintenance headaches.
** Navigate Permits and Legal Requirements
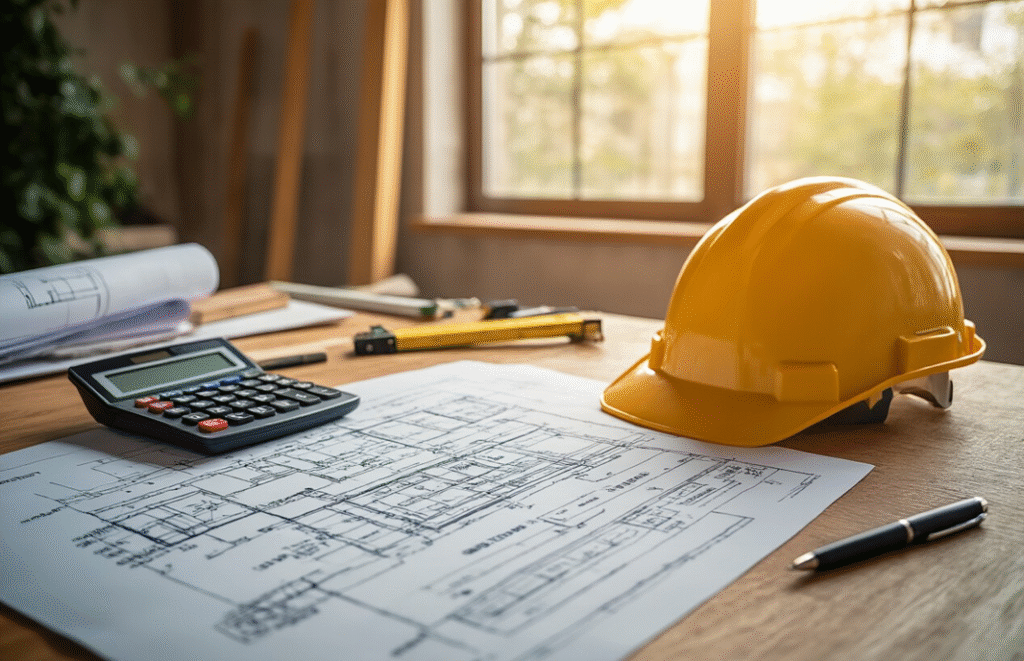
Obtain Necessary Building Permits and Approvals
Getting the right building permits and approvals in India is a step you cannot skip when planning your dream home. You’ll need sanctions from your municipal corporation, panchayat, or development authority depending on the plot location. Most projects require a building plan approval, and depending on your design, additional clearances for water, sewage, electricity, or structural safety.
The process starts with submitting your architectural drawings and application forms. Your architect or civil engineer will prepare the sanction plan and also provide essential drawings like the floor plan, elevation, section, and structural layout. Approval time varies by location and fees depend on plot size and built-up area.
Special permissions may apply in heritage zones, coastal areas, or for high-rise projects. RWAs or societies may also enforce their own rules. While contractors can handle submissions, staying involved helps you avoid delays. Always display permits on-site for inspections.
Pro Tip: Confirm the list of drawings with your architect early—this ensures your design complies with Development Control Regulations (DCR) and avoids costly redesigns later.
Ensure Compliance with Local Building Codes and Regulations
Building codes and regulations ensure your home is safe, durable, and legally approved. These rules cover everything from foundation depth, electrical wiring, and plumbing layouts to ventilation, fire safety, and structural strength. Your local municipal authority or development body enforces them, usually based on the National Building Code (NBC of India) with state-specific amendments.
Codes you’ll encounter include:
- Building codes → structural safety, fire norms, accessibility
- Electrical codes → safe wiring, socket placement, earthing
- Plumbing codes → approved pipe materials, water supply, drainage
- Energy codes → insulation, efficient lighting, solar readiness
Other key rules include setback requirements, FAR (Floor Area Ratio) limits, and height restrictions. Housing societies or RWAs may also enforce exterior design or landscaping standards.
While your architect or civil engineer ensures compliance, homeowners should know the basics to avoid costly redesigns.
✅ Quick Checklist of NBC Rules for Indian Homeowners:
- Minimum ceiling height → 2.75–3.0 m for living rooms
- Bedroom windows → required for ventilation & escape
- Electrical outlets → spaced for safety & convenience
- Staircases → proper handrails & guardrails mandatory
- Smoke detectors/fire safety → strongly recommended in larger homes
Pro Tip: Always ask your architect for the approved building plan, elevation, structural drawings, and service layouts to ensure everything meets NBC standards before submission.
Secure Required Inspections Throughout the Construction Process
construction inspections are carried out at key stages of your home build to ensure safety and compliance with the National Building Code (NBC) and local bye-laws. Your architect, engineer, or contractor usually coordinates these, but as a homeowner you should know when they happen and what they cover.
The sequence often begins with a foundation inspection before pouring concrete, ensuring soil quality, depth, and footing size meet standards. A structural or framing check follows once the building skeleton is complete, but before walls are closed. Rough electrical and plumbing inspections happen after wiring, pipes, and fittings are laid but before plastering.
Later, insulation and waterproofing may be checked in some cities, especially for basements and terraces. A final inspection covers completed electrical, plumbing, structural safety, and fire provisions. Only after this do authorities issue a Completion Certificate and Occupancy Certificate (OC), which legally allow you to move in.
| Inspection Type | Timing | What’s Checked |
| Foundation | Before concrete pour | Soil stability, footing depth, reinforcement steel, drainage provisions |
| Plinth / Framing | After plinth beam or structural frame completion | Structural strength, column & beam quality, grade of concrete/steel, alignment |
| Rough-in (Services) | After electrical & plumbing installation, before plastering | Wiring, earthing, conduit placement, plumbing lines, drainage slopes |
| Waterproofing & Insulation | Before flooring/roofing | Terrace & bathroom waterproofing, damp-proof course, insulation where required |
| Final Inspection | Project completion | All systems (electrical, plumbing, fire safety), structural stability, finishing quality, and compliance for Occupancy Certificate (OC) |
⚠️ Note: Failed inspections mean work halts until corrections are made and re-checks are cleared. This can delay timelines and increase costs, so always hire experienced civil engineers and contractors who know local codes.
Pro Tip: Keep digital and physical records of every inspection. These documents help with insurance claims, resale, and housing loan approvals later.
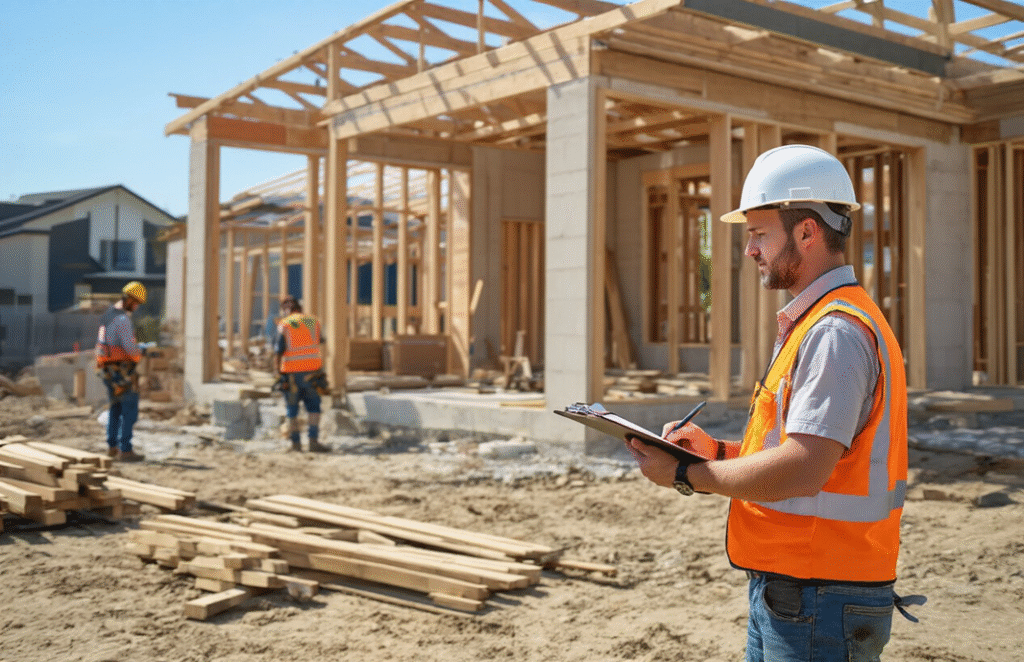
** Manage Construction Timeline and Quality Control
Establish Realistic Milestones and Completion Dates
Your construction timeline becomes the backbone of your entire building project. Start by working with
your contractor to break down the construction process into measurable phases – foundation, framing, roofing, electrical, plumbing, drywall, and finishing work. Each phase should have specific start and end dates that account for weather delays, material deliveries, and inspection schedules.
Build buffer time into your timeline – typically 10-20% extra time for each phase. Weather can shut down exterior work for days, and material shortages have become increasingly common. Your realistic timeline protects you from the stress and additional costs that come with unrealistic expectations.
Create a visual timeline or Gantt chart that you can reference weekly. This helps you track progress and identify potential delays before they cascade into bigger problems.
Schedule Regular Site Visits and Progress Reviews
Once construction starts, make weekly site visits part of your routine. Don’t drop in randomly—schedule visits with your contractor or site engineer, so they can walk you through progress and clarify any issues.
Always take photos and videos during each visit. These records help you track quality, compare work with the drawings, and protect you in case of disputes later. Focus on key stages:
- Weeks 1–4: Foundation, excavation, and plinth quality
- Weeks 5–8: Framing, columns, and structural accuracy
- Weeks 9–12: Electrical wiring and plumbing rough-ins
- Weeks 13–16: Waterproofing, insulation, and plastering prep
Ask questions if you see anything that doesn’t match the plan. A professional contractor or engineer should clearly explain any changes and confirm whether they affect your design, budget, or safety.
Pro Tip: Keep a simple site diary with photos, notes, and contractor responses. It strengthens accountability and ensures your dream home is built exactly as planned.
Address Changes and Unexpected Issues Promptly
In construction, unexpected problems are normal—how you handle them decides whether they stay minor or turn into costly delays. If your contractor or engineer finds issues like poor soil conditions, waterlogging, or outdated utility lines, always ask for a written explanation with proposed solutions.
Whenever possible, request multiple options. For example, if your foundation needs extra support, compare different methods and their cost implications instead of rushing into one decision.
Make sure every change order is documented before work continues, including:
- A clear description of the change
- Cost impact (materials + labor)
- Timeline implications
- Effect on other parts of construction
Keep a running log of all changes. Even small modifications—extra electrical points, better tiles, or design tweaks—can add up quickly and push your budget beyond limits if not tracked.
Pro Tip: Use a spreadsheet or site diary to record change orders, costs, and approvals. This creates transparency with your contractor and keeps your budget under control.
Maintain Quality Standards Through Each Construction Phase
Your attention to quality can’t wait until the final walkthrough. Establish quality checkpoints at the end of each major phase before the next phase begins. Once drywall goes up, you can’t easily inspect electrical or plumbing work.
Create a quality checklist for each phase based on building codes and your contract specifications. For framing, check that walls are plumb and square. For electrical rough-in, verify outlet locations match your plans. For drywall, look for smooth joints and proper corner finishing.
Don’t hesitate to point out work that doesn’t meet standards. Professional contractors appreciate owners who are engaged and want quality work. If you notice recurring quality issues, address them directly with your contractor rather than letting them accumulate.
Take advantage of official inspections as quality control checkpoints. Building inspectors catch code violations, but they don’t ensure work meets your aesthetic standards or contract specifications. You need to be the advocate for your own quality standards throughout the process.
Your dream house isn’t just about beautiful rooms and impressive features—it’s about creating a space that truly reflects who you are and how you want to live. From defining your vision and understanding your lifestyle needs to setting a realistic budget and finding the right location, every step builds toward making your dream a reality. Working with the right team of professionals, from architects to contractors, will help you navigate the complex world of floor plans, permits, and construction timelines while keeping your project on track.
The journey from empty plot to your perfect home requires patience, planning, and careful attention to detail. Don’t rush through the early stages—taking time to really think through your needs, secure proper financing, and choose the right location will save you headaches later. Remember that building a house is a marathon, not a sprint, and having the right team supporting you makes all the difference. Start with that clear vision of what you want, stay organized throughout the process, and soon you’ll be holding the keys to a home that’s uniquely yours.